
The ‘our way’ in the title may indicate that we have some super secret steps that we take that make our setups so much more successful than others, but the reality is that our setup tutorials tend to be written for the section of our hobby that don’t have the technical terms, knowledge, etc. down pat yet. We just try to simplify everything, including our explanations.
With that said, please continue!
To enable you to install Pi-Star, you must meet some prerequisites before beginning. Those are:
- A microSD card that is V30 rated (for speed and longevity purposes), or Clas10 minimum.
- Have your DMR ID number sorted out from https://radioid.net
- A MMDVM, or “Pi-Star” stack like we’ve described here or a suitable alternate.
- Frequencies of your choice within the HAM band. Typically UHF separated by 5MHz.
- Have a DMR radio that is programmed for your chosen hotspot frequencies.
- Logins for Brandmeister, TGIF, and any other “server” of your choice, to initiate a hotspot password.
First, let’s look at the pistar.uk menu and I’ll list the menu items we will use in this tutorial.
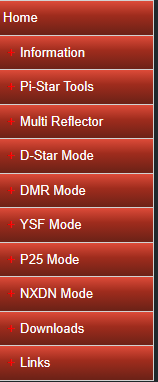
The main menu items that we will use are Pi-Star Tools for the WiFi Builder, and the Downloads menu item. First, we have to determine the version of Pi-Star to download. If you’re using the stack, or a stack very similar to what we described in our other tutorial, that version will be (currently the latest) Pi-Star_RPi_V4.3.7_01-May-2026. For some reason, that version isn’t working nice with our setup, and I have no idea why, so I suggest downloading the Pi-Star_RPi_V4.2.3_18-Apr-2025.zip. Once that is downloaded, we will use the Raspberry Pi Imager to ‘burn’ it onto the microSD card that you’ve chosen. While you’re waiting on the download to complete, you can visit the Pi-Star Tools menu item and then the WiFi Builder tool.
Enter your network’s name into the SSID box, and then your password for joining that network in the PSK box and click Submit Query.
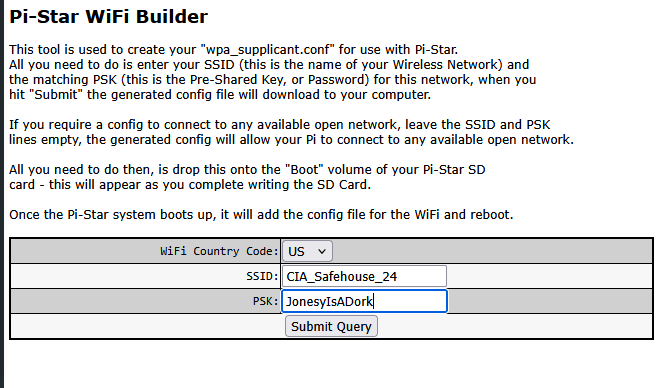
This will automatically write the information into a file called wpa_supplicant.conf and then download it to your download folder that is set for your browser’s downloads. In my case that’s my Downloads folder.
Once the Pi-Star operating system has downloaded we will use it in the Raspberry Pi Imager to ‘burn’ the microSD card now. You first have to extract it from the compressed file. Right click on the file that was downloaded and ‘Extract All’. This will leave you with a .img file which is what we want to work with. Open Raspberry Pi Imager (assuming you’ve installed it previously. If not, do so now by downloading from this link for Windows. You will have to go to RaspberryPi.com to download versions for Mac or Linux of you aren’t using Windows. Install your version then continue.)
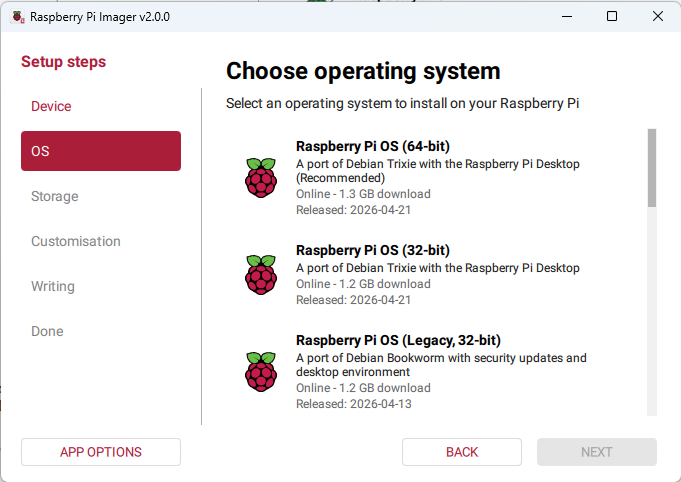
Click on the device that you’re using (not pictured). In our case, we’re using Raspberry Pi 3. Click next, and you will see the above image. Scroll down until you see ‘Use Custom’. Click on ‘Use Custom’ and it will open a file dialog. Navigate to where the Pi-Star software you downloaded is extracted to (the .img or .iso file) and select it, then click ‘Open’. Click Next and select your microSD card storage, then click Next again. If you are asked whether or not you want to Customize, decline. Like WPSD, customization will overwrite any of the setup that Pi-Start makes for URL when completed and can cause you to be unable to reach your Pi-Star node to administer it. Continue through the writing process until the verification stage completes. Verification is not mandatory, so you can cancel verification should you choose, but I recommend going ahead and letting it compare the written image to the image downloaded to ensure the write wasn’t corrupted. Note: Unlike WPSD, you must extract the file from the zipped folder, as the writer doesn’t recognize that you’ve selected a compressed file. It will literally write the compressed file to the microSD card and this will do nothing for you other than confuse you as to why you can’t proceed.
Once the ‘burn’ is completed on Raspberry Pi Imager, close it out and unplug your microSD card from the computer that you’re using to ‘burn’ it, then after a few seconds, plug it back in and allow the boxes to pop up. If you get the message that the card needs formatting, ignore them and do not press anything. There may be several boxes that popped up, which is fine. Find the one that has the ‘boot’ folder listed. Once that is found, copy and paste the wpa_suppliment.conf file as you downloaded it from PiStar.uk and allow it to write. Once completed, insert your microSD card into the pi stack. I prefer a hard wired LAN, but if you’ve entered everything for your WiFi network correctly in the wpa_suppliment.conf file, your Pi-Star stack will connect to WiFi after booting.
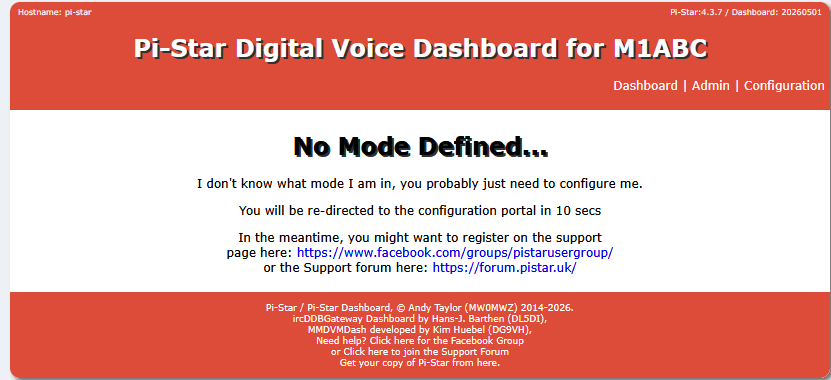
Plug in the Pi-Star stack to power, and allow it to completely boot for the initial boot. This may take up to 90 seconds, which should be the longest it ever takes to boot, but be patient. Once it has booted, type pi-star.local into your browser’s address bar.

If all is well, you should see the dashboard page of the Pi-Star instance you’ve just put together. The default login information is pi-star for usernam and raspberry for password. Click on Configuration and log in.
You should now see the dashboard with a red banner up top warning that your password is the default password.
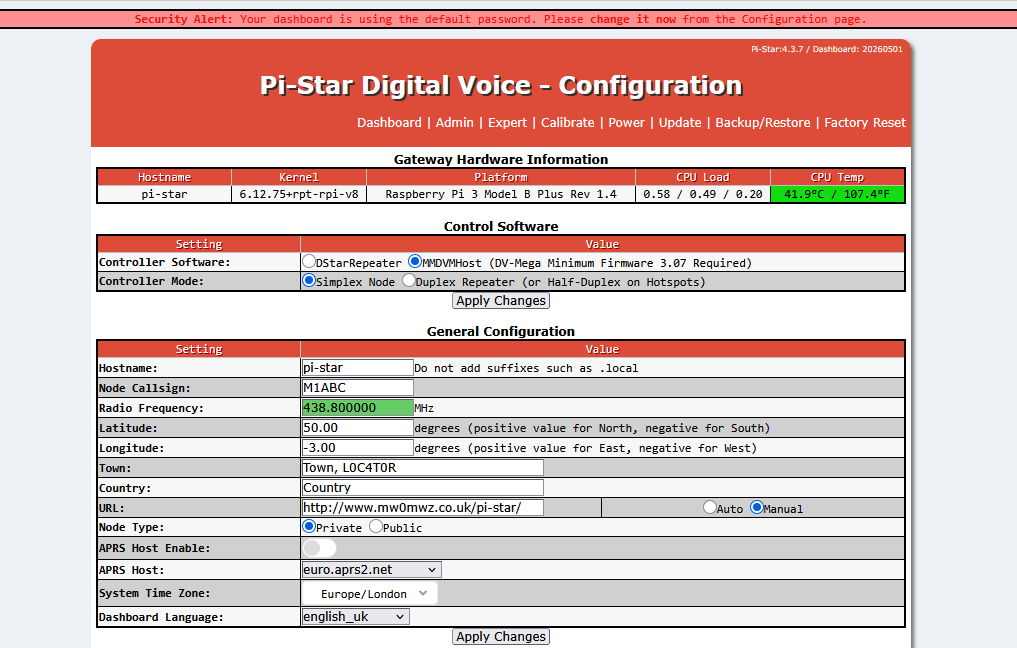
If we scroll all the way to the bottom of the Configuration page, you will see ‘Remote Access Password’ with two text boxes underneath it. Change the default password by inputting a new password, using the same password in both boxes.

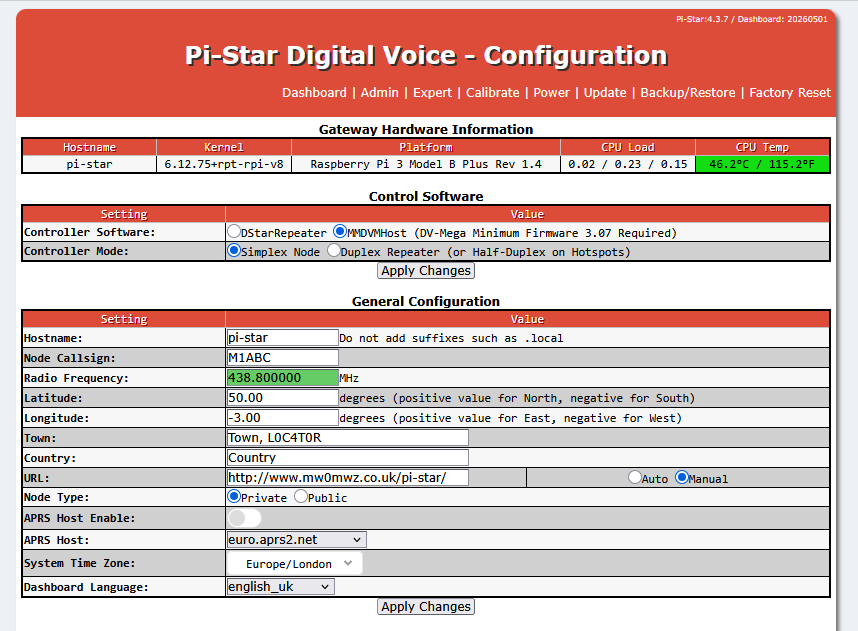
If you’ve successfully typed both passwords the same, the background on the right box will turn from red (which it turns to when you input anything into the first box) to green. If they match click Set Password. You will then be forced to log in again, but the banner warning you about the password change will have disappeared.
The first change we will make, assuming you’ve built this Pi-Star stack from our tutorial, is the Duplex Repeater setting. Click the Duplex Repeater radio button and then click Apply Changes. You will be very accustomed to clicking Apply Changes before we’re through, trust me. You will be met with a warning, which is Ok. Just select Ok.
Scroll down to the General Configuration section and we’ll begin making our changes for the general hotspot to work, we’ll change the features in a while.
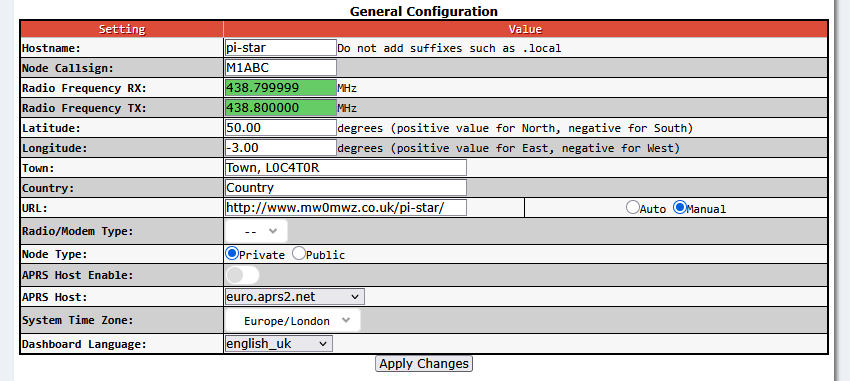
We will change your Node Callsign to your call sign, the radio frequencies to the frequencies you chose earlier, Town to your town, and the Radio/Modem Type. The other settings are not important, but should be set correctly as well. Select english_us, and your time zone as well.
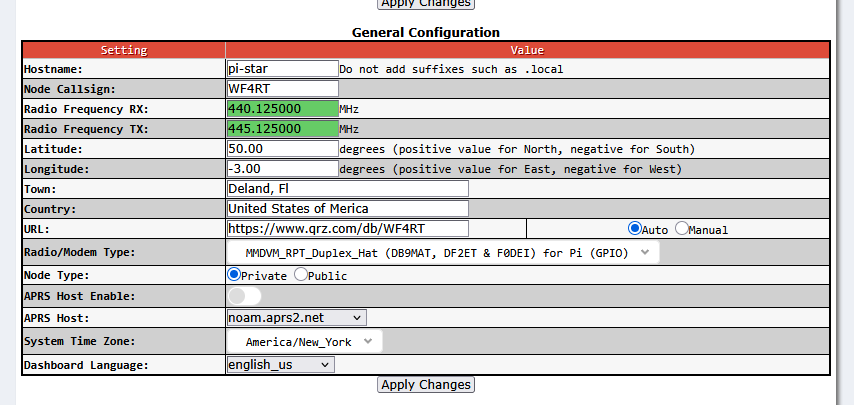
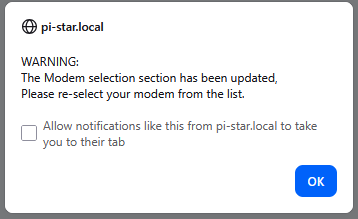
The option for Radio/Modem Type: if you built the Pi-Star stack from our tutorial will be MMDVM_RPT_Duplex_Hat (DV9MAT, DF2ET & F0DEI) for Pi (GPIO). Once you’ve set these settings and clicked Apply Changes, the dashboard will reload with more options available.
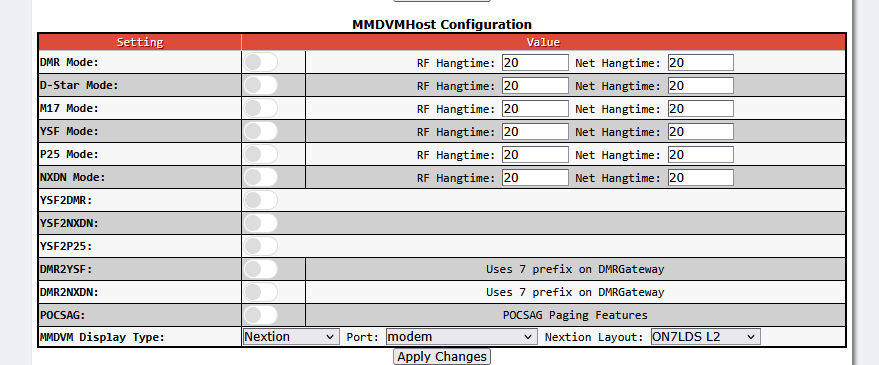
We now want to change the display type to Nextion, change the port to Modem, then set the Nextion Layout to ON7LDS L2 for the 2.4″ screen or ON7LDS L3 for the one listed in our tutorial. In this case, I’m setting up an older stack, so I’m using a 2.4″ screen.
Once done setting the screen and clicking Apply Changes, the dashboard will then reload again and we’re ready to set up DMR. Unlike the WPSD setup, there are no profiles, so each time you change from DMR to YSF with YSF2DMR, you will have to re-enter quite a bit of information. There is a known bug that makes the [DMR Network 1] password change to the last DMR network’s password, so you will have to pay attention to that switching from YSF mode back to DMR.
Now is a good time to update the software. Yes, I know you just installed it, but update it anyway. Trust me. Click on Configuration, then Update, and voila it are done dit. (After a little bit.) This update will fix bugs that may exist in the initial download, and which may prevent you from getting things working properly.
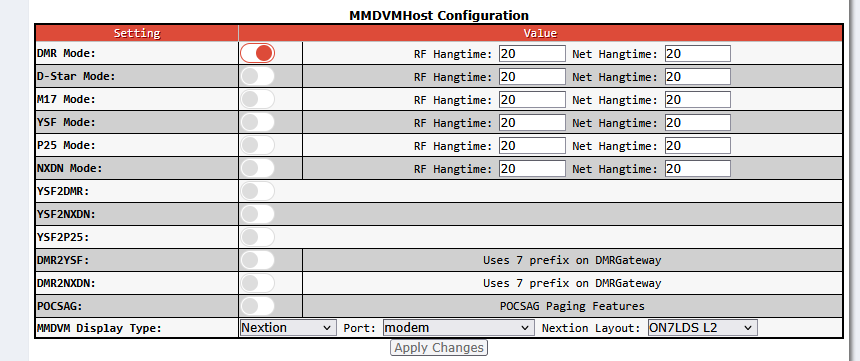
The problem we’ve got with running both DMR and YSF at the same time is that with DMR active, that is the first mode the hotspot will attempt to broadcast in, and your YSF radio will hear digital noise. So, we have to switch them manually when we are changing the modes, and the reminder I just gave you is one of the considerations. With that said, turn on the switch for DMR and click Apply Changes.
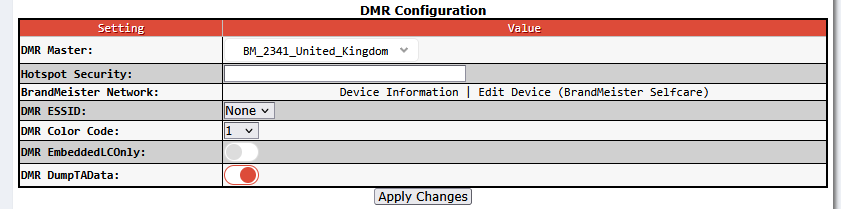
Once you’ve clicked Apply Changes and the dashboard reloads, you can now scroll down to the DMR Configuration box and look at the settings that can be changed. We won’t do any of this here, as I am about to give you a file to copy and paste over your DMR Configuration file so that you are able to use your hotspot the same way we use ours. If you aren’t interested in using yours like we use ours, follow the order of the boxes, change their pertinent information, and click Apply Changes and your DMR is ready to use once the hotspot connects to the server(s) that you input. Moving on to our setup.
Click ‘Expert’ at the top of the page.

Click on DMR GW beside the Full edit: choices.

This will open the DMR Gateway configuration in a text box.
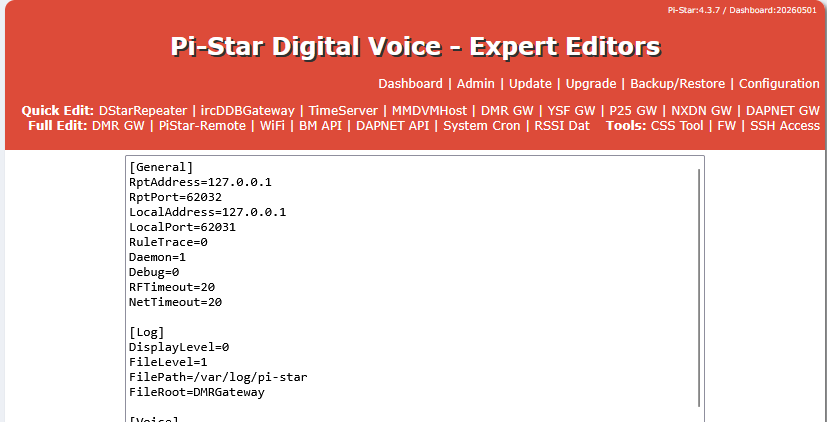
The following should replace everything that is in the textbox. You can do so by selecting everything inside this text box and highlighting it in blue, then copy and paste everything in the following.
[General]
RptAddress=127.0.0.1
RptPort=62032
LocalAddress=127.0.0.1
LocalPort=62031
RuleTrace=0
Daemon=1
Debug=0
RFTimeout=20
NetTimeout=20

[Log]
DisplayLevel=0
FileLevel=1
FilePath=/var/log/pi-star
FileRoot=DMRGateway

[Voice]
Enabled=1
Language=en_GB
Directory=/usr/local/etc/DMR_Audio

[Info]
Enabled=0
RXFrequency=440125000
TXFrequency=445125000
Power=1
Latitude=50.00
Longitude=-3.00
Height=0
Location="Deland"
Description="United States of Merica"
URL=http://www.mw0mwz.co.uk/pi-star/

[XLX Network]
Startup=950
Enabled=0
File=/usr/local/etc/XLXHosts.txt
Port=62030
Password=passw0rd
ReloadTime=60
Slot=2
TG=6
Base=64000
Relink=60
Debug=0
Id=3182338
UserControl=1

[DMR Network 1]
Enabled=1
Address=3104.master.brandmeister.network
Port=62031
TypeRewrite1=1,9990,1,9990
TypeRewrite2=2,9990,2,9990
SrcRewrite1=1,4000,1,9,1
TGRewrite0=2,9,2,9,1
PCRewrite0=2,94000,2,4000,1001
PassAllPC1=1
PassAllTG1=1
PassAllPC2=2
PassAllTG2=2
Password="Enter_Your_Password_Here"
Id=Enter_Your_DMRID_Here
Debug=0
Name=BM_3104_United_States
Location=1

[DMR Network 2]
Enabled=0
Address=78.129.135.43
Port=55555
TGRewrite0=2,8,2,9,1
TGRewrite1=2,80505,2,505,1
TGRewrite2=2,80800,2,800,100
TGRewrite3=2,83801,2,3801,8
TGRewrite4=2,89990,2,9990,1
TGRewrite5=2,80001,1,1,9999
TGRewrite6=2,80001,2,1,9999
SrcRewrite1=1,1,2,80001,9999
SrcRewrite2=2,1,2,80001,9999
PCRewrite0=2,84000,2,4000,1001
Password="PASSWORD"
Debug=0
Id=3182338
Name=DMR+_IPSC2-DVSPh-F
Location=0

[DMR Network 4]
Enabled=1
Name=TGIF_Network
PCRewrite1=1,4009990,1,9990,1
PCRewrite2=2,4009990,2,9990,1
TypeRewrite1=1,4009990,1,9990
TypeRewrite2=2,4009990,2,9990
TGRewrite1=1,4000001,1,1,999999
TGRewrite2=2,4000001,2,1,999999
SrcRewrite1=1,9990,1,4009990,1
SrcRewrite2=2,9990,2,4009990,1
SrcRewrite3=1,1,1,4000001,999999
SrcRewrite4=2,1,2,4000001,999999
Address=tgif.network
Password="Enter_Your_Password_Here"
Port=62031
Location=0
Debug=0
Id=Enter_Your_DMRID_Here

[GPSD]
Enable=0
Address=127.0.0.1
Port=2947

[APRS]
Enable=1
Address=127.0.0.1
Port=8673
Description=APRS for DMRGateway
Suffix=DMR

[Dynamic TG Control]
Enabled=1
Port=3769

[DMR Network 3]
Enabled=0
Name=DMR2NXDN_Cross-over
Id=Enter_Your_DMRID_Here
Address=127.0.0.1
Port=62035
Local=62036
TGRewrite0=2,7000001,2,1,999998
SrcRewrite0=2,1,2,7000001,999998
PCRewrite0=2,7000001,2,1,999998
Password="PASSWORD"
Location=0
Debug=0
Scroll down the box once you’ve pasted the above code, and find [Network 1]
I use 3104.master.brandmeister.network as the Address. You can use anything off of Brandmeister’s list, and should probably find the one that is closest to your physical location for speed reasons. Change the Password section to your hotspot security password as listed on the Brandmeister site. (This isn’t your login password, it is the password you set for hotspots under Self Care section of BM’s website, and User Security on TGIF when you click your call sign in the top right corner.) Once you’ve set the information in [Network 1] we’re going to scroll down to [Network 4] and enter the same information there, except you must use the password that is given to you from TGIF.network’s User Security section as noted above.
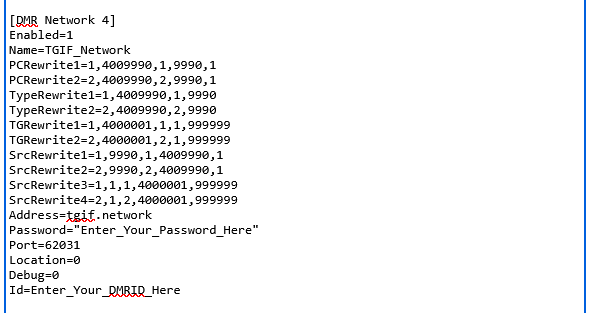
Note: You should add a suffix to your DMR ID in all the places you add your DMR ID on this configuration. It must be two numbers. So if your DMR ID is 123456, you would type in 12345601 for a suffix of 01, etc. To differentiate between multiple hotspots, should you run more than one for any reason, keep track of the suffix numbers you use, so you don’t duplicate them.
Once you’ve made your changes, click Apply Changes. We should be off to the races. Test your hotspot with your DMR radio (assuming you’ve programmed your radio for the frequencies, talkgroups, etc. to match your hotspot.)
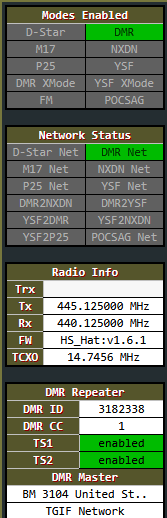
If there is any issue with the setup that you’ve done, the DMR in Modes enabled and DMR Net in Network Status will be red or yellow indicating an issue. If the DMR Net is yellow, you have set up the hotspot correctly, most likely, but your login information is incorrect, which means your password doesn’t match Brandmeister or TGIF. While we’re off to the races, we have to enter our car to be able to talk to our TGIF talkgroup full time, if that’s what you’d like to have happen. We do this by telling our hotspot to use 48429 (The Zoo 2 Talkgroup) as the default talkgroup.
If you haven’t yet, click Admin on the top right menu of your Pi-Star dashboard. (You’ll not that I’ve changed colors on my dashboard as I’ve grown tired of the assault on my eyes that the red gives off. I’ll write a tutorial on how to do that and you can look for it.) The TGIF Manager should be visible about half way down the screen.

In the Talkgroup Number box, type in 48429, click the radio button for Link, then click Modify Static. You should see the box change to TGIF API: Ok, and then change back. There is nothing that indicates what static talk group is active on Pi-Star, unfortunately, so you’ll know if you were able to make it happen if you can talk through to our group, as it will also go through the club node that has DVSwitch set up on it, and thus through our Allstar network we have set up. If you’re wanting to test, it may be a good idea to contact one of The Zoo 2 friends that you’ve made and have them see if they can hear you. You’ll know because they will talk back to you via our netowrk.
That about sums up this tutorial, and I hope it helped. With any of our tutorials, please let us know if you’ve noticed anything that needs to be changed or updated and we will make it happen.
Until next time…
~73, WF4RT
 Nextion Screen Programming for Pi-Star Stack (Moderate)
  WPSD Setup, Our Way
  Meshtastic Vs. MeshCore
  Pi-Star Setup, Our Way