So you followed our tutorial to get ASL3 up and running, and now you’ve to add Echolink to your setup so you can get in without a radio. We’ll cover a couple of basics, but you need to know that changes made to the files we are describing can and will ‘break’ your node and make it stop working if done incorrectly. With that said, there is no reason not to make changes, and to explore what settings do in the files. There is nothing you can break that cannot be fixed, even if it means you start from scratch again. Echolink settings will not disrupt your node working, so fear not on this one, just know that any manual typing you do within the configuration files can and will, outside of this tutorial. If you have any doubts, ask. There are no stupid questions except those you don’t ask. Without further adieu, here we go.
Echolink
For you to get Echolink working on your ASL3 node, the changes that need to be made are fairly basic, but there are prerequisites that must be accomplished prior to turning on your ASL3 Echolink. With Echolink being entirely and overly obfuscated as to how to accomplish everything, you’ll have to resort to Echolink’s guidance on getting these prerequisites out of the way (for the most part). Those are:
- Your call sign must have either a node authorized with either a -R or -L behind it.
- You must know your Echolink password, and be willing to hard code it into the ASL3 configuration.
- You must understand and be capable of port forwarding on your network.
- You must decide how many consecutive connections can be used to your ASL3 Echolink node at a time.
- You must be able to connect to your node externally to your network, either by phone app or a computer on a separate network. (To test.)
To obtain a -R or -L to your call sign on Echolink, assuming you have registered at echolink.org, you must have Echolink validate your call sign with the -R or -L behind it, separately from your main call sign that is activated. Follow their instructions. Once you’ve done so, each call sign you’ve validated will have a different node number assigned to it. Make note of the node number that you are attempting to put into service attached to your Allstar node. It must be either a -R or -L, or you will not be able to log in to Echolink anywhere else because it is occupying your main call sign. Echolink only allows one echolink node to be present on the same IP, so you can only run once instance of the Echolink ‘server’ if you have multiple Allstar nodes. This does not mean you cannot run your echolink node and log in to it via your standard call sign on a phone or tablet while connected to the same network. Just the ‘server’ instances. It is based on your public facing IP (your ISP’s IP for your modem). You should also note that the Echolink software included in ASL3 or HAMVOIP are not official Echolink written pieces of software, so they will not support you at Echolink in fixing any issues you have. That’s where we come in, and there are plenty of resources available at the Allstarlink site on the forums, etc. to reference.
With the prerequisites out of the way, or about to be explained, here we go.
The first thing we have to do to get your Echolink going within the ASL3 software is to edit the echolink.conf file via the asl-menu. Go to your ASL3 node’s terminal and type in:
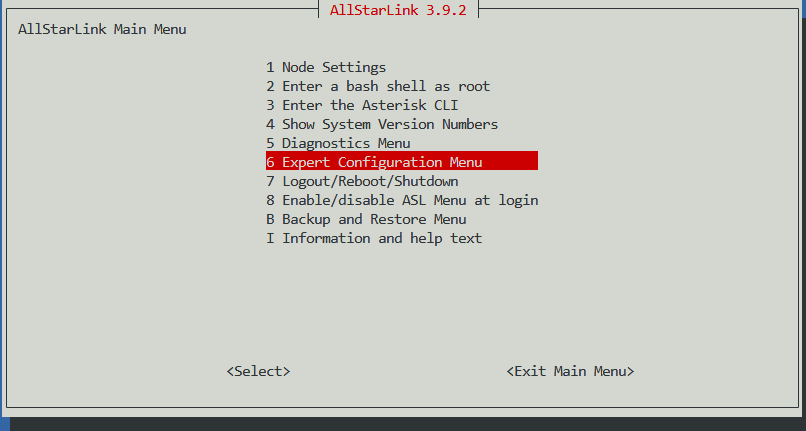
sudo asl-menuOnce the main menu comes up, use the down arrow to highlight Expert Configuration Menu and hit enter.
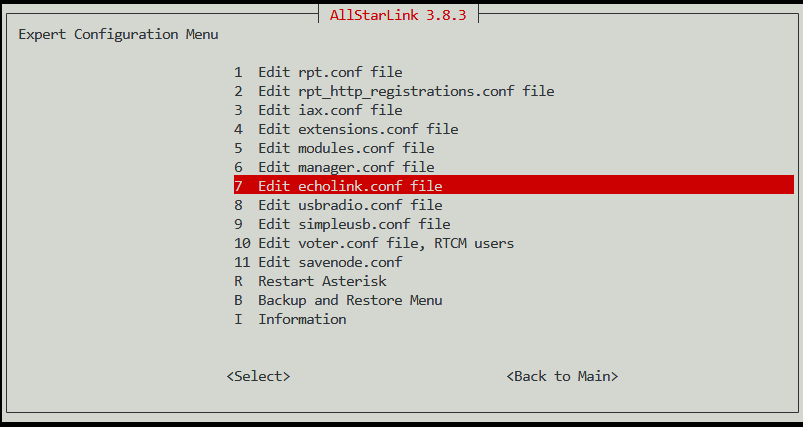
Use the down arrow key to highlight Edit echolink.conf file and hit enter.
You should now see the page to edit the file, with the information of the file sitting on your screen. Don’t worry, it isn’t that difficult to figure out, however, if you screw any of the code up, it will make your echolink not work, so do be careful here. (As with any of the issues created, we can fix what you break, we just have to know what you broke…)
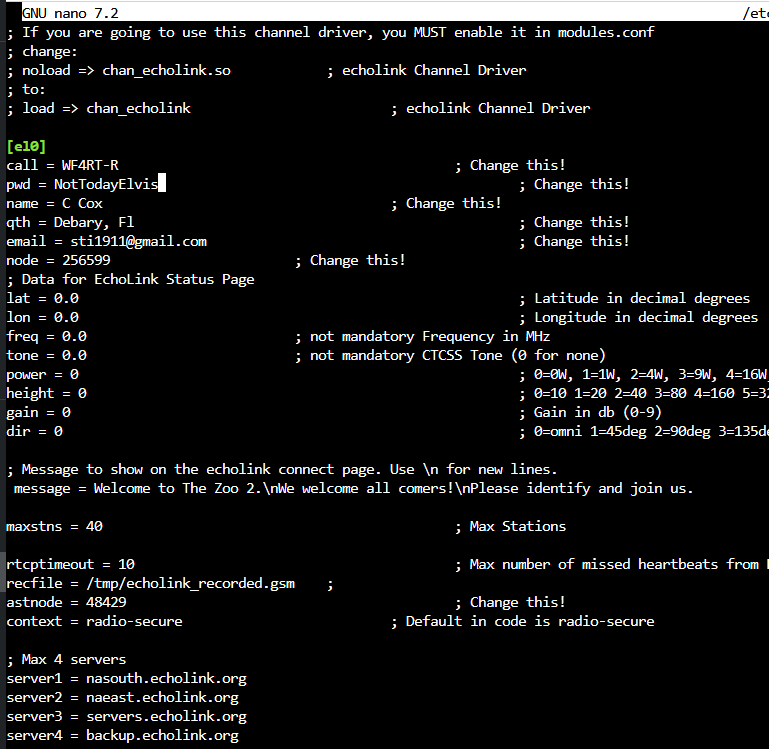
The first line you will edit, by using your down arrow to take the cursor to, is the call line under the [e10] section.
Enter the call sign that you activated earlier, with either the -R or -L behind it on this line. Remove any other information between the equal (=) sign and the semicolon (;) for the note on that line. I choose to leave the notes so that I can reference them later, but some choose to remove those as well. I suggest you leave them and concentrate on the information you’re entering. Using the image above, you can tell that the next obvious line to change is the pwd line, followed by the next four lines. Those are the only lines that are absolutely necessary for Echolink to work, technically, but there will be one more that we change, just for operational purposes, and to ensure that Echolink is playing along with our node. Change the name= line to whatever you’d like to be called, change the qth= line to where ever you’d like the system to say you are, input your email that Echolink has registered for you at Echolink, then input the node number I told you to make note of earlier. This node number is different than your ASL3 node number, and comes from the Echolink page that shows your individually activated call signs. (YourCallSign)-R has it’s own, as does the -L, so make sure you’ve retrieved the right one. Then move the cursor to maxstns= line. 10 is a good number here for most folks. If you have the bandwidth on your internet connection that will facilitate larger numbers, allow more in. There are limiting factors to the number of stations attached at any given point, which are internet bandwidth capabilities of your connection, processing power of the host computer, and whether or not the host computer is on WiFi or hard line LAN. Enter your ASL3 node number in the astnode= blahblahblah line. Time to save. Press Ctl-X, press y, and then hit enter. File saved.
That next step is to edit the modules.conf file to load Echolink with Asterisk. After you saved the file, the menu popped back up, or should have, in the Expert Configuration Menu. Using your up or down arrow, highlight Edit modules.conf file and hit enter.
Scroll down to the section that is listed as ;Channel Drivers and look for noload = chan_echolink.so. Move the cursor to the n in noload, and delete no from the line. It should look like the following when you’re done.
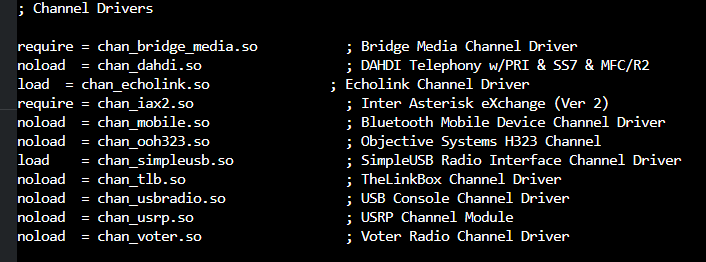
Again, hit Ctl-X, Y, and enter for the changes to be saved. At this point, you will have to restart Asterisk for the changes to be made, and the node will come up utilizing Echolink attached to your ASL3 node. We may not be out of the woods quite yet, as we have to do some port forwarding for these changes to take affect.
If you don’t know your IP address to the ASL3 node, that’s fine, you can find it in a couple of different ways. The easiest is to click on the Networking tab on the left hand side of the node’s dashboard. Just for grins, we can also type in the following command in the terminal of the dashboard.
sudo ip addressTyping the previous command brings up something similar to the next image.
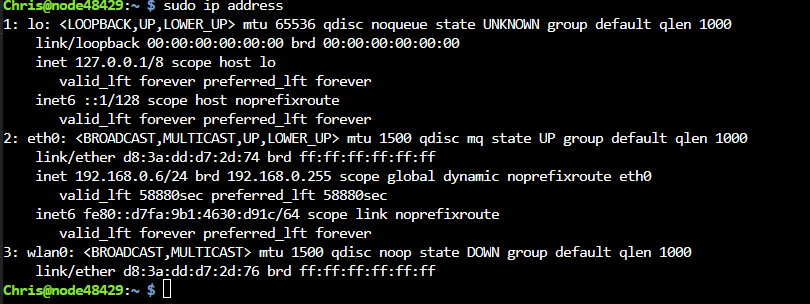
Note that there is a ton of information here. The eth0 connection in the above example is listed because I have hard wired my connection via a LAN cable to the switch in my router system. If you had the host computer on WiFi, the information would be in the wlan0 section. For now, I am referencing my IP as ending in 06. Therefore, all of the following ports must be forwarded in my router to pass to 192.168.0.6. Those ports are:
- 5198/UDP (inbound)
- 5199/UDP (inbound)
- 5200/TCP (outbound, which is seldom needed, but in the event it won’t connect, may be.)
I won’t go through port forwarding in this post, as this should be figured out by your specific router.
Until the next time…
~73, WF4RT
 Nextion Screen Programming for Pi-Star Stack (Moderate)
  Pi-Star Setup, Our Way
  WPSD Setup, Our Way
  Meshtastic Vs. MeshCore